caramelize crème brûlée is the defining moment in creating this iconic dessert. That signature glassy, golden crust provides the perfect crackle, offering a delightful contrast to the creamy custard below. However, achieving the perfect caramelization requires more than just sprinkling sugar and heating it—it’s about precision, the right tools, and technique. This article provides a comprehensive guide on how to caramelize brûlée, from selecting tools to mastering techniques and troubleshooting common issues.
Tools and Equipment for Caramelizing Brûlée
1.1 The Essential Kitchen Torch
A kitchen torch is the go-to tool to caramelize crème brûlée. Compact and easy to use, it allows you to control the heat with precision. There are two main types of torches:
- Butane Torches:
These are the most common and widely available. They are lightweight, easy to refill, and produce a clean flame suitable for even caramelization. - Propane Torches:
Though larger, propane torches are often used by professionals for their high heat output. They are ideal if you’re caramelizing multiple ramekins quickly.
When selecting a torch, look for models with adjustable flame settings for better control and a comfortable grip for safety.
1.2 Alternatives to the Torch
If you don’t have a kitchen torch, don’t worry—there are alternatives:
- Broiler Method:
A broiler is an effective option to caramelize brûlée. Place the ramekins on a baking tray close to the broiler’s heat source. Keep a watchful eye to avoid burning, as broilers can caramelize unevenly if not monitored. - Grill or Stovetop Caramelization:
For those feeling adventurous, grilling or stovetop methods can work. These methods involve placing ramekins close to high heat, but they require extra care to prevent over-caramelization or scorching.
While these options can achieve a caramelized crust, they don’t offer the precision or ease of a kitchen torch.
1.3 Ramekins and Sugar Distribution Tools
The ramekins you use significantly affect caramelization. Opt for flat-bottomed ramekins with shallow sides to ensure even heat distribution and a uniform crust.
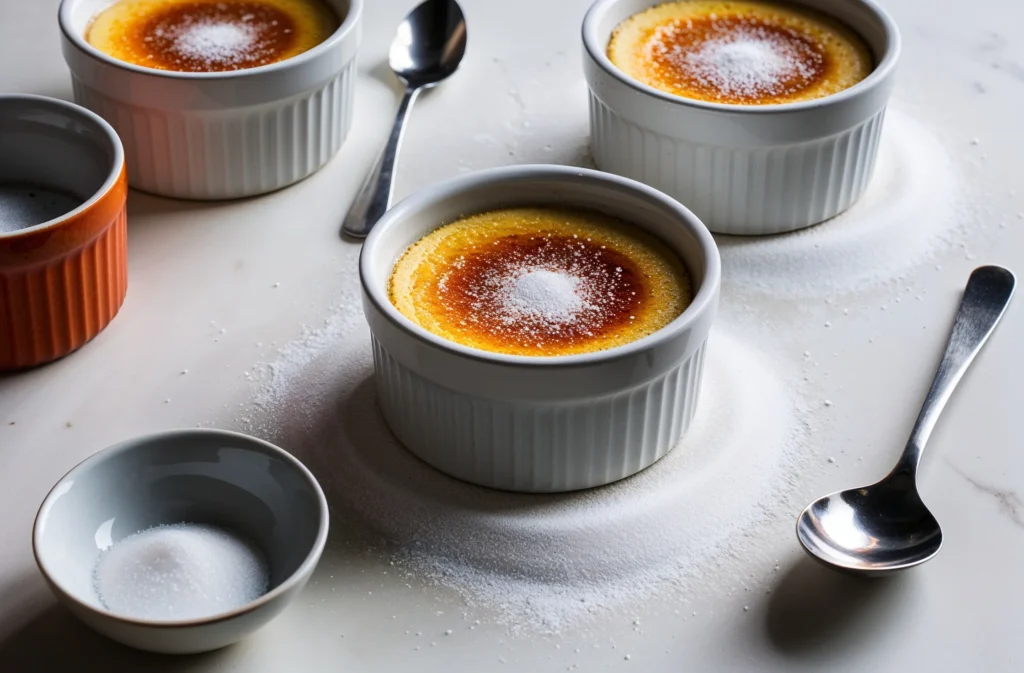
For sugar distribution, tools like fine mesh sieves or even the back of a spoon are helpful. These tools allow you to sprinkle sugar evenly, which is essential for achieving a consistent caramelized layer.
Table: Torch vs. Broiler to Caramelize Brûlée
| Method | Advantages | Disadvantages |
|---|---|---|
| Kitchen Torch | Precise control, even caramelization | Requires purchase/refilling fuel |
| Broiler | Easily available in most kitchens | Harder to control, risk of burning |
| Grill/Stovetop | Creative option, no special tools | Less precise, uneven results |
Choosing and Preparing the Sugar
2.1 Types of Sugar for Caramelizing
The type of sugar you use significantly influences the taste, texture, and appearance of your brûlée crust. Here are the most common options:
- Granulated Sugar:
The most traditional choice, granulated sugar caramelizes evenly and forms a smooth, crackly layer. Its fine texture ensures quick melting under a torch or broiler. - Superfine Sugar:
Known for its smaller crystals, superfine sugar melts faster and is less likely to clump. It’s ideal for those seeking a thinner, more delicate crust. - Raw or Turbinado Sugar:
This sugar’s larger crystals add a more robust, slightly crunchy texture. However, it may take longer to caramelize and requires careful attention to avoid uneven melting.
Each type of sugar offers a unique caramelization experience, so choose based on your desired flavor and texture.
2.2 Measuring the Right Amount of Sugar
The amount of sugar you use is just as critical as the type. Too much sugar creates a thick, hard layer that overshadows the custard, while too little fails to achieve the signature crack. For best results:
- Use about 1–2 teaspoons of sugar per ramekin.
- Spread the sugar evenly across the surface to prevent thin or burnt spots.
Using a fine mesh sieve can help distribute the sugar uniformly, creating a consistent layer for caramelizing.
2.3 Preparing the Custard for Caramelizing
Before caramelizing, the custard must be properly prepared. Follow these steps for optimal results:
- Chill the Custard:
Ensure the custard is thoroughly chilled before adding sugar. A cold custard provides a stable base, preventing the heat from melting or softening it during caramelization. - Dry the Surface:
Pat the custard surface gently with a paper towel to remove any condensation. This ensures the sugar adheres evenly and caramelizes properly. - Apply the Sugar:
Sprinkle the sugar evenly, tilting the ramekin as needed to cover the surface. Use a spoon or your fingers to smooth out any clumps.
Proper preparation ensures a flawless caramelization process, with the sugar melting smoothly into a golden crust.
Techniques for Caramelizing Brûlée
3.1 Using a Kitchen Torch
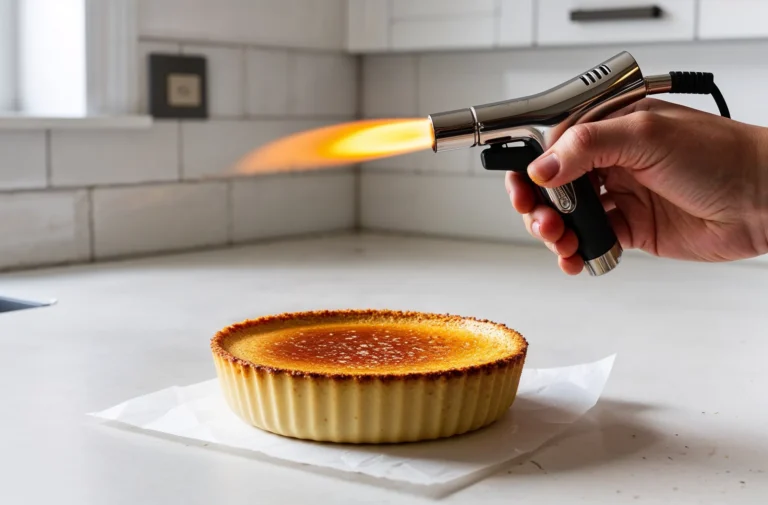
The kitchen torch is the gold standard to caramelize crème brûlée. It gives you precise control over the heat, allowing for even caramelization. Follow these steps for a flawless sugar crust:
- Prepare the Torch:
Ensure your kitchen torch is fully fueled and the flame intensity is adjustable. Use a medium flame for consistent results. - Position the Torch:
Hold the torch about 2–3 inches above the sugar surface. This distance prevents the sugar from burning while allowing even heat distribution. - Move the Flame:
Move the flame in a slow, circular motion. Start at the edges and work your way toward the center, ensuring the sugar melts uniformly. - Watch for the Perfect Color:
Stop torching when the sugar turns a golden-brown hue. Avoid over-torching, as this can result in a burnt or bitter taste.
Using a kitchen torch is quick and effective, producing a glossy, crackly crust in just a few minutes.
3.2 Caramelizing Under a Broiler
If you don’t have a torch, a broiler is a great alternative. While it requires more attention, it can still achieve a beautifully caramelized topping. Here’s how to do it:
- Preheat the Broiler:
Set your oven’s broiler to high and let it heat for a few minutes. Place a baking tray on the middle rack to prevent the ramekins from sitting too close to the heat. - Prepare the Ramekins:
Place the ramekins on the baking tray and ensure the sugar layer is even. - Caramelize:
Position the tray about 4–6 inches from the broiler. Watch closely, as the sugar can caramelize quickly. Rotate the ramekins halfway through if the caramelization appears uneven. - Cool Briefly:
Let the ramekins sit for a few minutes after broiling to allow the sugar to harden into a crisp crust.
While broilers lack the precision of a torch, they offer a reliable alternative to caramelize brûlée.
3.3 Advanced Techniques for Even Caramelization
For those looking to perfect their caramelization skills, consider these advanced tips:
- Double Layering Sugar:
Sprinkle a thin layer of sugar, caramelize it lightly, then add another layer and repeat. This method creates a thicker crust with a more robust crunch. - Blowtorch for Larger Surfaces:
If you’re caramelizing multiple ramekins or larger dishes, a blowtorch offers higher heat output for quicker, uniform results. - Experiment with Flavors:
Add a pinch of cinnamon or citrus zest to the sugar before caramelizing for a subtle twist. These flavors pair beautifully with the creamy custard.
Mastering these techniques ensures professional-level results every time you caramelize crème brûlée.

Troubleshooting Common Caramelization Issues
4.1 Uneven Caramelization
Uneven caramelization is a common issue that can detract from the appearance and texture of your brûlée. This often happens due to inconsistent sugar distribution or torching technique. Here’s how to fix it:
- Causes:
- Unevenly sprinkled sugar creates thick and thin areas that caramelize at different rates.
- Moving the torch too quickly or holding it too far from the surface results in patchy caramelization.
- Solutions:
- Use a fine mesh sieve to distribute the sugar evenly over the custard.
- Hold the torch steady and move it in slow, controlled circles to melt the sugar uniformly.
Taking your time during this step ensures a consistent, golden-brown crust.
4.2 Burnt Sugar
Burning the sugar can lead to a bitter taste, overshadowing the custard’s sweetness. Prevent this by mastering your torching technique:
- Causes:
- Holding the torch too close to the surface.
- Lingering in one spot for too long.
- Solutions:
- Keep the torch at least 2–3 inches above the surface and move it continuously.
- Watch the sugar closely and stop caramelizing as soon as it reaches a golden-brown color.
If burning occurs, you can scrape off the top layer and reapply sugar for a second attempt.
4.3 Runny or Sticky Sugar Layer
A sticky or under-caramelized sugar layer can ruin the brûlée experience. This usually happens when the sugar isn’t heated enough to fully melt and harden.
- Causes:
- Insufficient heat or uneven caramelization.
- Using damp sugar or a wet custard surface.
- Solutions:
- Ensure the custard is completely chilled and the sugar layer is dry before torching.
- Apply consistent heat until the sugar melts entirely and forms a hard crust.
Patience and attention to detail will help you avoid sticky or runny sugar layers.
4.4 Troubleshooting Other Issues
Occasionally, you may encounter less common problems, such as cracking custards or overly thick sugar layers. Here’s how to address them:
- Cracking Custard:
- Avoid excessive heat exposure by torching the sugar quickly and evenly.
- Overly Thick Sugar Layer:
- Measure sugar carefully to prevent a heavy crust that overpowers the custard.
By troubleshooting these issues, you can consistently achieve a picture-perfect brûlée with a crackly, caramelized top.
Tips for Perfectly Caramelized Brûlée
5.1 Achieving the Right Texture
The hallmark of a perfectly caramelized crème brûlée is its crisp, glass-like sugar crust that cracks effortlessly under a spoon. To achieve this texture:
- Consistency Matters:
Spread the sugar evenly over the custard to ensure a uniform crust. Uneven layers can result in patches of soft or overly thick sugar. - Timing Is Key:
Serve crème brûlée immediately after caramelizing to maintain the crunch. Over time, the sugar layer can absorb moisture from the custard and lose its crispness.
When done correctly, the crack of the crust reveals the creamy custard beneath, delivering the perfect sensory experience.
5.2 Enhancing Flavor with Sugar Variations
While plain granulated sugar creates a classic brûlée crust, experimenting with flavored sugars can elevate the dessert:
- Cinnamon-Infused Sugar:
Add a pinch of ground cinnamon to the sugar before caramelizing for a warm, spiced twist. - Citrus Zest Sugar:
Mix fine sugar with orange or lemon zest to add a bright, tangy note to the topping. - Brown Sugar:
For a deeper, molasses-like flavor, use brown sugar. Note that it caramelizes faster and requires careful torching to avoid burning.
These variations add subtle complexity to the dessert while maintaining its iconic texture and appeal.
5.3 Presentation and Serving Tips
Presentation plays a crucial role in elevating crème brûlée from a simple dessert to a show-stopping finale. Here are a few tips:
- Garnishes:
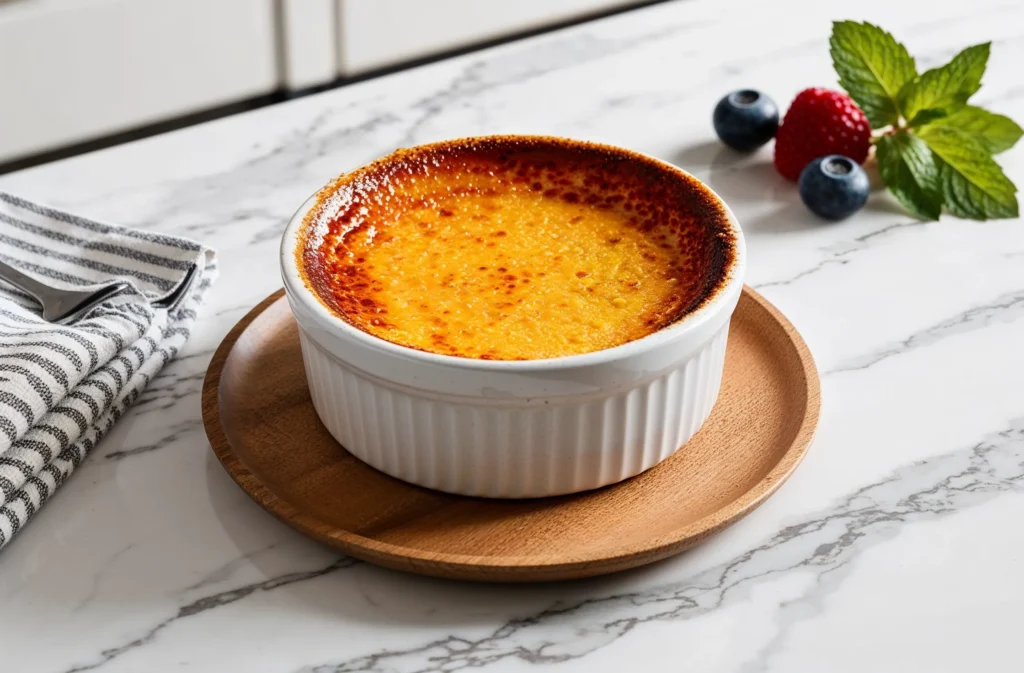
Top the caramelized crust with fresh berries, mint leaves, or a sprinkle of edible gold flakes for a touch of elegance. - Serve in Style:
Use shallow ramekins for a wider surface area, showcasing the caramelized top and making it easier to crack. - Accompaniments:
Pair the brûlée with complementary sides like a glass of dessert wine or a dollop of whipped cream.
By focusing on presentation, you can turn your crème brûlée into an unforgettable dining experience.
5.4 Practice Makes Perfect
Caramelizing crème brûlée is an art that improves with practice. Don’t be discouraged if your first attempts aren’t flawless. Over time, you’ll develop the confidence and skill to create a beautifully caramelized crust every time.
- Experiment with different sugar types and tools to find your preferred method.
- Pay attention to feedback from your taste testers and refine your technique accordingly.
With these tips, you’ll soon master the art of caramelizing crème brûlée, creating desserts that impress both in taste and presentation.

Conclusion
Throughout this guide, we’ve explored the essential tools, from the precision of a kitchen torch to alternatives like broilers. We’ve also covered the importance of sugar selection and preparation, with tips for achieving the ideal thickness and texture. Whether you’re using granulated sugar for a classic crust or experimenting with flavored variations like citrus zest or cinnamon, attention to detail is key.
Perfecting caramelization techniques, whether with a torch or broiler, ensures uniform results and prevents common issues like uneven caramelization or burnt sugar. Troubleshooting tips help you overcome challenges, while advanced methods, such as double-layering sugar, can elevate your results to professional levels. And let’s not forget the importance of presentation—garnishes, ramekins, and thoughtful serving suggestions can turn crème brûlée into the star of any meal.
So, grab your tools, choose your sugar, and get torching. Each crack of the crust and every creamy bite will remind you why crème brûlée is a timeless dessert loved by all.

